This post may contain affiliate links. As an Amazon Associate, I earn from qualifying purchases. If you click and buy, we may earn a small commission at no extra cost to you. Learn more.
Okay, these Witch Finger Chicken Tenders might just be the most fun thing you make in your air fryer this Halloween season. They’re crispy, golden brown, and just creepy enough to make kids giggle and adults do a double take. Whether you’re throwing a party or just want to spook up dinner, these are guaranteed to be a hit!
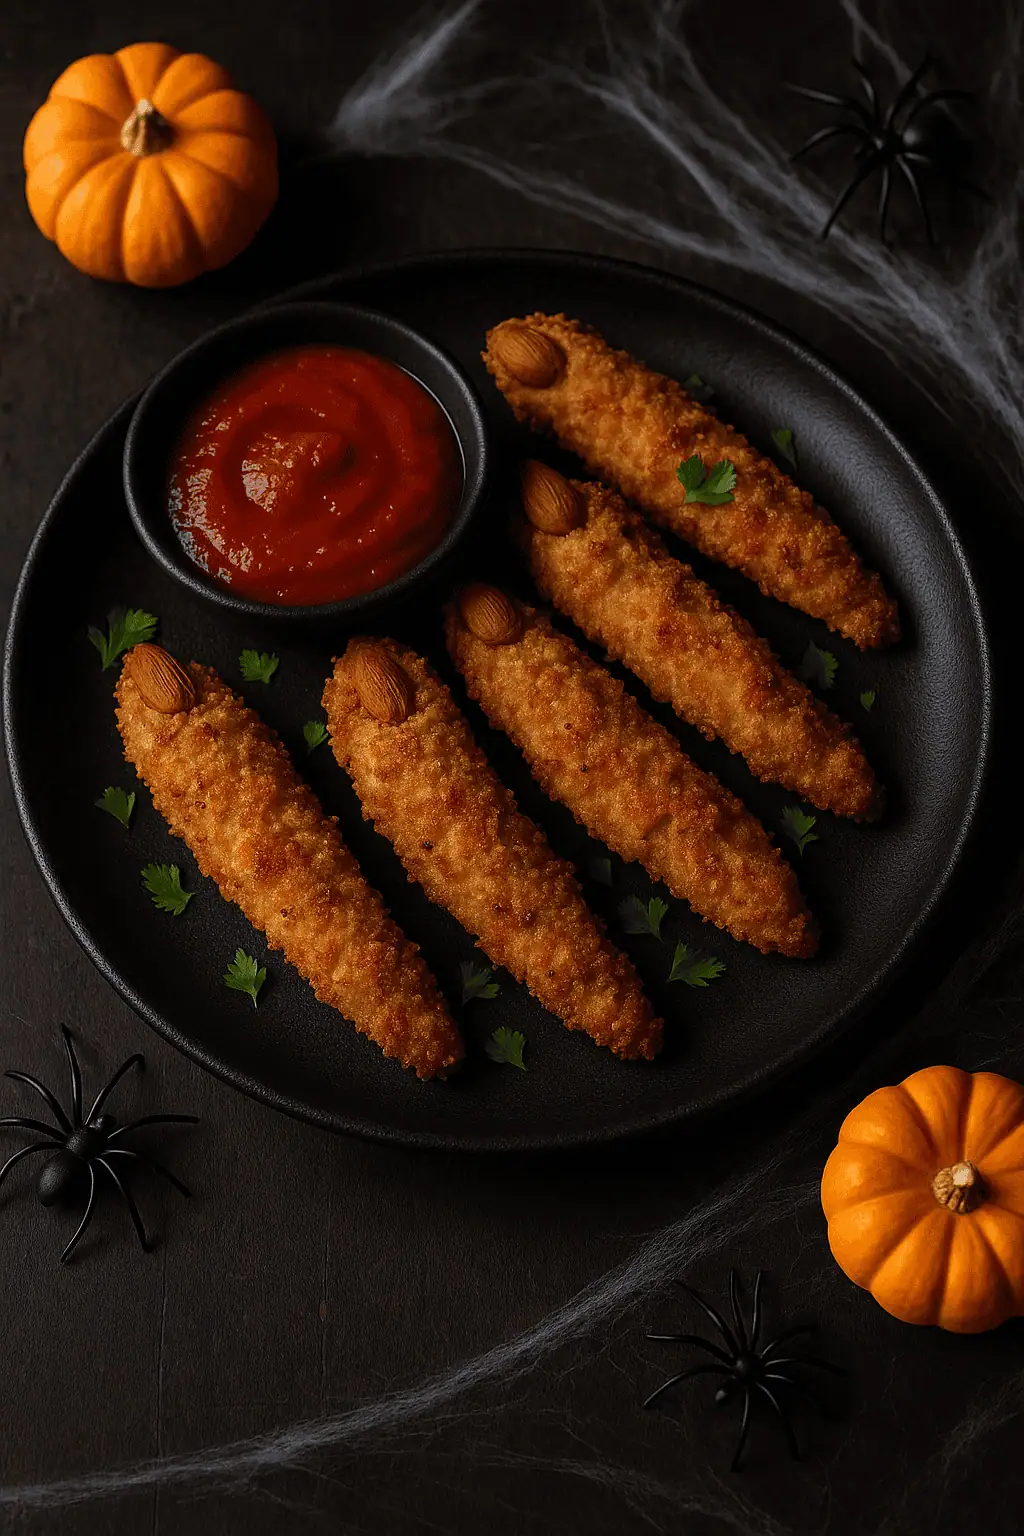
We actually made these for a Halloween movie night, and they totally stole the show. The almond “fingernail” is such a simple touch, but it makes all the difference in turning plain old chicken into spooky finger food — literally.
Air frying makes them perfectly crispy without any deep frying mess. And since they’re shaped by hand, they’ve got that gnarled, witchy look built right in. Juicy inside, crunchy outside, and loaded with spooky vibes.
They take about 25 minutes from start to finish, and they’re easy enough to make with kids (just keep an eye on the raw chicken handling). Let’s bring the Halloween spirit to your dinner table!
🥕 Ingredients Overview
Here’s what you’ll need to bring these creepy tenders to life:
- Chicken tenders – Boneless, skinless tenders or breasts sliced into finger shapes. Go for uniform size for even cooking.
- Flour – For dredging; helps the egg wash stick. Use all-purpose or gluten-free flour.
- Eggs – To bind the coating to the chicken.
- Breadcrumbs – Panko works best for crispy results. Gluten-free panko works great too.
- Spices – We use garlic powder, onion powder, paprika, salt, and pepper. You can bump up the paprika for color and flavor.
- Whole almonds – These become the fingernails! Blanched almonds give the best look, but any whole almond works.
- Cooking spray or oil – For helping the coating crisp in the air fryer.
You can swap breadcrumbs for crushed cornflakes or seasoned coating if you’d like. Almonds can be replaced with pumpkin seeds or slivers of red bell pepper for a nut-free version.

🔥 Step-by-Step Instructions
- Prep the chicken fingers
- Slice chicken breasts into finger-shaped strips (about 1 inch wide).
- Lightly season with salt and pepper.
- Set up your dredging station
- Bowl 1: Flour
- Bowl 2: Beaten eggs
- Bowl 3: Breadcrumbs mixed with garlic powder, paprika, onion powder, salt, and pepper
- Coat the chicken
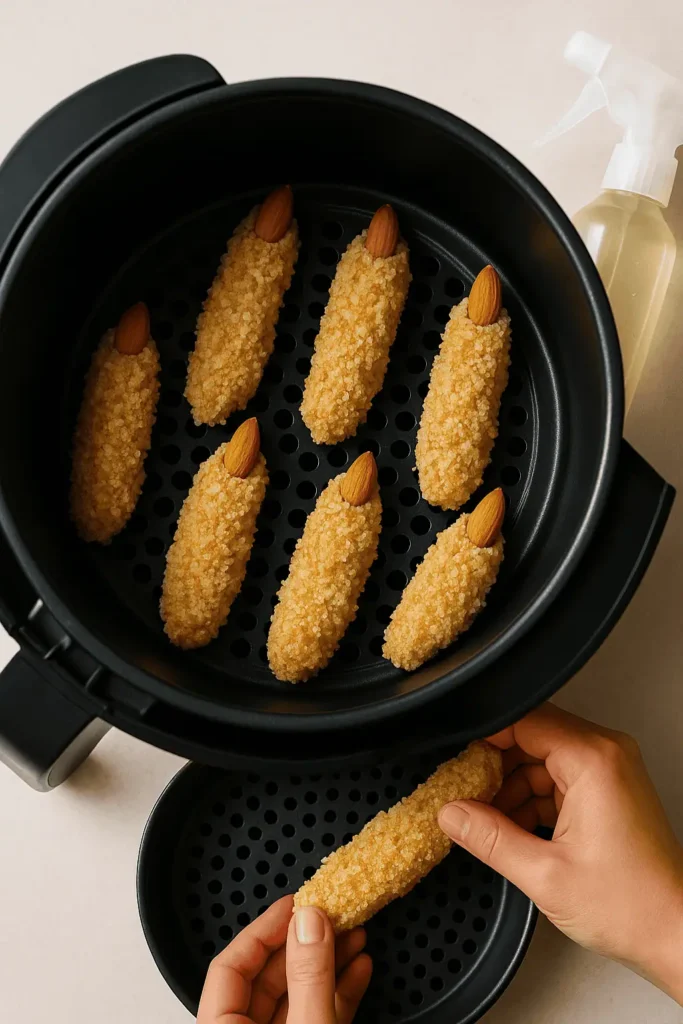
- Dip each strip in flour, then egg, then breadcrumbs. Press gently to adhere.
- Press a whole almond onto the tip of each tender to look like a fingernail.
- Pro Tip: Angle the almond slightly and press firmly so it doesn’t pop off while cooking.
- Preheat the air fryer
- Set to 375°F and let it preheat for 3–5 minutes.
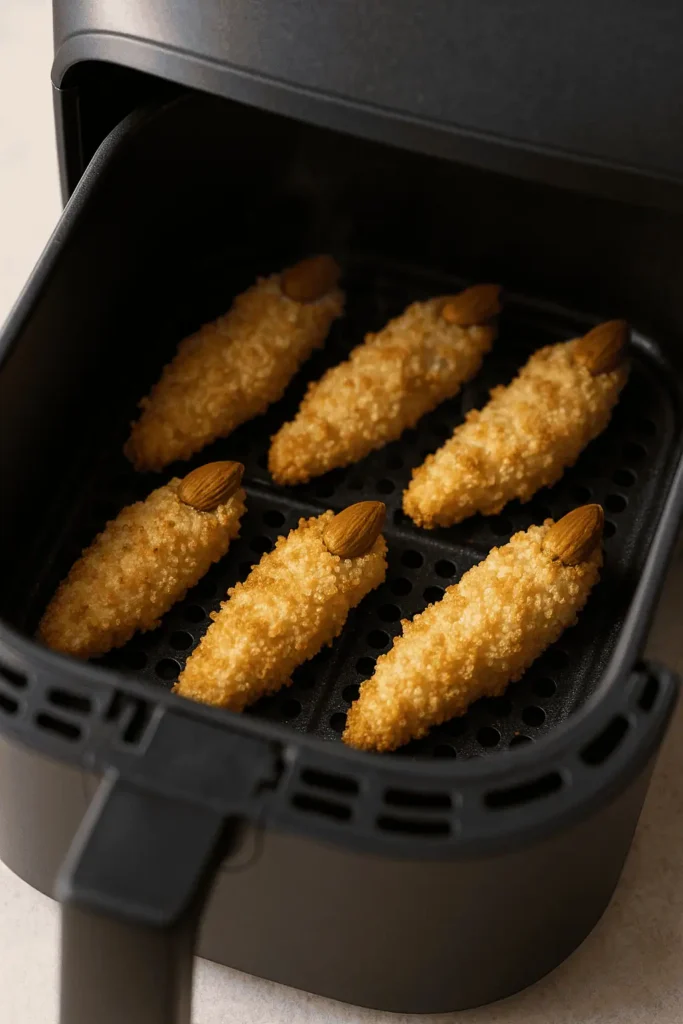
- Air fry the witch fingers
- Spray the basket lightly with oil.
- Place tenders in a single layer. Spray tops with oil.
- Air fry at 375°F for 10–12 minutes, flipping halfway.
- Pro Tip: Don’t overcrowd the basket — air circulation is key to crispiness.
- Serve spooky-style!
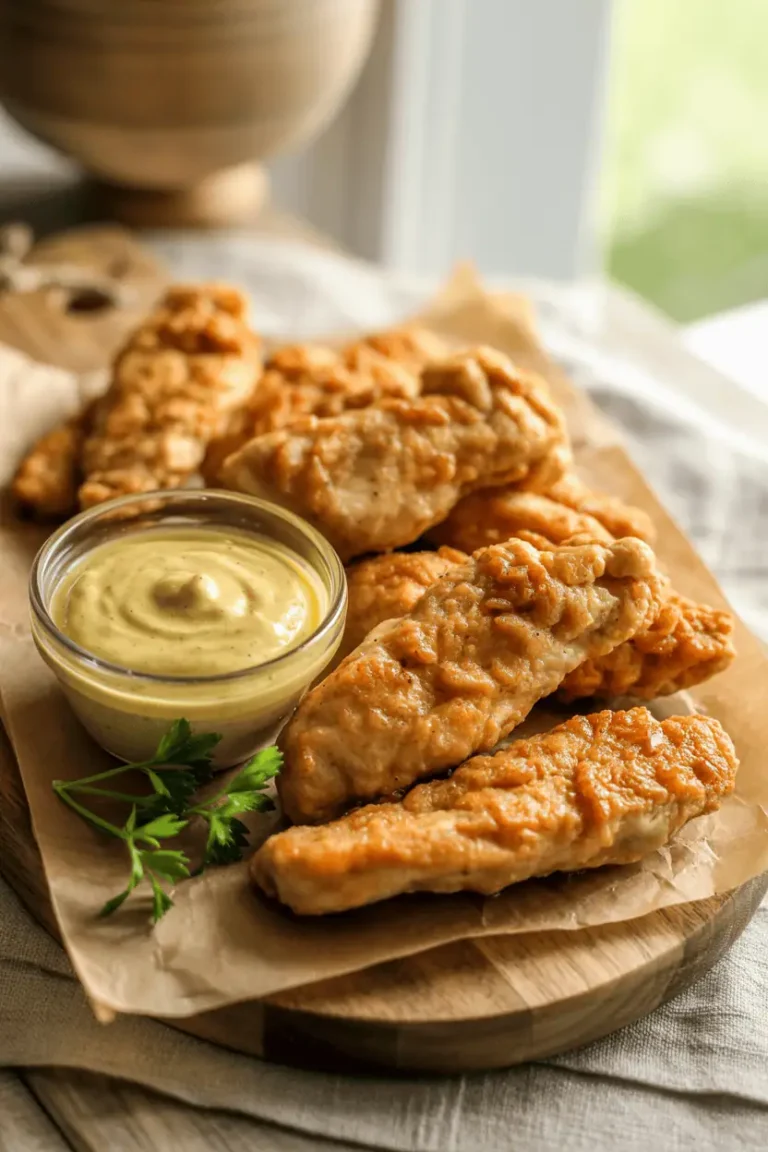
- Let them cool slightly, then plate them with a side of marinara “blood” sauce or your favorite dip.


❌ Common Mistakes to Avoid
- Don’t skip preheating — it helps the coating set instantly.
- Avoid crowding the basket or the fingers won’t crisp up.
- If almonds fall off, press them in again mid-cook or add a dab of egg wash.
- Don’t under-season the breadcrumb mixture — that’s where the flavor lives.
- Be gentle flipping so you don’t knock the “nails” loose.
🎨 Variations & Add-Ons
- Spicy Witch Fingers: Add cayenne pepper or chili flakes to the breadcrumb mix.
- Gluten-Free: Use almond flour and gluten-free breadcrumbs.
- Low Carb: Swap flour for coconut flour and breadcrumbs for crushed pork rinds.
- Nut-Free: Use pumpkin seeds or red bell pepper strips for the fingernails.
- Kid-Friendly Dips: Serve with ranch, ketchup, or cheese sauce.
- Grown-Up Version: Add a smoky chipotle mayo or sriracha-laced dip.
📦 Make Ahead & Storage
You can bread the tenders up to 1 day ahead — just cover and refrigerate until ready to cook.
Leftovers? Pop them in an airtight container and store in the fridge for up to 3 days. Reheat in the air fryer at 350°F for 4–5 minutes to get them crispy again.
Want to freeze them? Bread the tenders, freeze on a tray, then transfer to a freezer bag. Air fry from frozen at 375°F for 15–17 minutes.
🥗 Nutrition Highlights
High in protein. Lower in fat than deep-fried chicken. Kid-approved!
Air Fryer Witch Finger Chicken Tenders
Ingredients
Equipment
Method
- Slice chicken into finger-shaped strips. Season lightly.
- Set up 3 bowls: flour, eggs, and breadcrumbs with spices.
- Dredge chicken in flour, then egg, then breadcrumbs.
- Press an almond onto the tip of each to make a nail.
- Preheat air fryer to 375°F.
- Spray basket and tenders with oil.
- Air fry 10–12 minutes, flipping halfway.
- Serve with marinara or your favorite dip.
Notes
- Gluten-free? Use GF flour and breadcrumbs.
- Make ahead: Bread tenders 1 day ahead.
- Storage: Fridge 3 days; reheat in air fryer.
If you make these air fryer Witch Finger Chicken Tenders, I’d love to hear how they turned out! They’re creepy, crispy, and just the right amount of festive for Halloween. Don’t forget to snap a pic and tag @SimplyAirCook — it totally makes my day seeing your spooky creations.
Looking for another Halloween bite? Try my air fryer mummies or ghost-shaped quesadillas. Until next time — happy haunting and happy air frying!