This post may contain affiliate links. As an Amazon Associate, I earn from qualifying purchases. If you click and buy, we may earn a small commission at no extra cost to you. Learn more.
Quick Answer
To clean your air fryer, unplug it and let it cool completely, then remove the basket and pan to wash with warm soapy water. Wipe the interior with a damp cloth, clean the heating element gently with a soft brush, and dry everything thoroughly before reassembling.
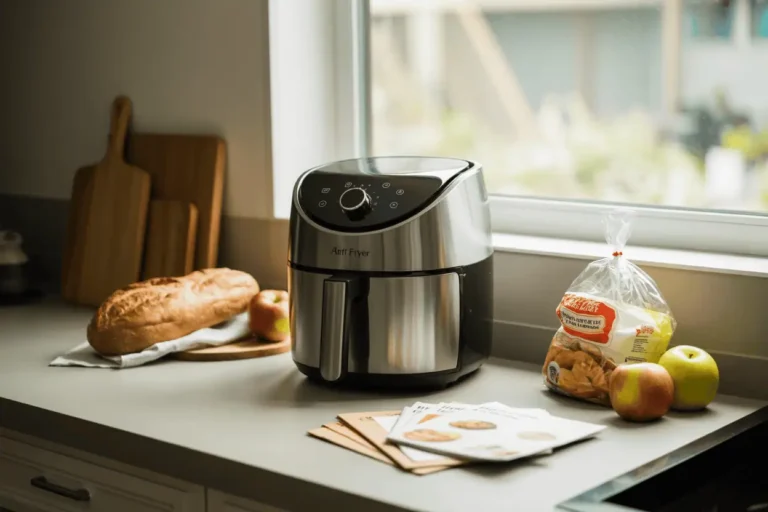
You’ve probably noticed that greasy film building up in your air fryer basket. Or maybe you’ve spotted crumbs stuck to the heating element after making one too many batches of chicken wings. A clean air fryer isn’t just about hygiene — it actually cooks better, lasts longer, and won’t set off your smoke alarm mid-recipe.
I’ll be honest: I used to think a quick rinse was enough. Then I wondered why my fries weren’t crisping like they used to. Turns out, oil residue blocks airflow, and that’s the whole point of an air fryer. Let me show you exactly how to clean your air fryer the right way — no scrubbing for hours, just smart techniques that work.
In This Guide
What You Need to Clean Your Air Fryer
Before you start, gather these supplies. You probably already have everything in your kitchen. No fancy cleaners required — just basic household items that won’t damage the nonstick coating.
- Dish soap: Dawn or any grease-cutting formula works best
- Soft sponge or cloth: Never use steel wool or abrasive scrubbers
- Baking soda: For stubborn, baked-on grease
- White vinegar: Cuts through oil and removes odors
- Soft-bristle brush: An old toothbrush is perfect for tight spots
- Microfiber cloth: For the exterior and control panel
- Non-abrasive scrub brush: Optional, but helpful for the basket
Never use harsh chemicals like oven cleaner or bleach. They’ll damage the nonstick surface and leave residue that can get into your food. Stick with gentle, food-safe options.
Daily Cleaning After Each Use
This is the routine that keeps your air fryer in great shape. Do this after every cooking session, and you’ll never face a deep-cleaning nightmare. It takes about 5 minutes, max.
How to clean your air fryer — step by step
Step-by-Step Daily Cleaning
- Unplug and cool down: Always unplug your air fryer first. Let it cool for at least 10 minutes — hot surfaces can warp under cold water.
- Remove the basket and pan: Pull out the basket and drawer. Dump any crumbs or leftover food into the trash.
- Soak in warm soapy water: Fill your sink with warm water and a squirt of dish soap. Let the basket and pan soak for 5-10 minutes if there’s stuck-on food.
- Wash with a soft sponge: Scrub gently with a non-abrasive sponge. For stubborn spots, make a paste with baking soda and water, apply it, wait 2 minutes, then scrub.
- Wipe the interior: Use a damp cloth to wipe the inside of the air fryer. Don’t forget the area around the heating element — crumbs love to hide there.
- Dry everything completely: Pat dry with a clean towel or let air dry. Never reassemble while wet — moisture can cause odors or damage electronics.
Most air fryer baskets are dishwasher-safe, but I hand wash mine. The dishwasher can wear down the nonstick coating faster, especially if you use harsh detergent. Check your manual to be sure.
Deep Cleaning Your Air Fryer (Weekly)
Even with daily cleaning, grease builds up over time. Once a week, give your air fryer a thorough deep clean to keep it performing like new. This is especially important if you cook fatty foods like bacon or chicken thighs regularly.
The Deep Clean Process
- Make a baking soda paste: Mix 2 tablespoons of baking soda with 1 tablespoon of water. This creates a gentle abrasive that won’t scratch.
- Apply to greasy areas: Spread the paste on the basket, pan, and any greasy spots inside the air fryer. Let it sit for 15-20 minutes.
- Scrub with a soft brush: Use a non-abrasive brush or old toothbrush to work the paste into the grime. You’ll see it lift right off.
- Rinse thoroughly: Wash away all the baking soda with warm water. Make sure no residue remains — it can leave a white film if you miss any.
- Deodorize with vinegar: Mix equal parts white vinegar and water in a spray bottle. Spray the interior lightly, wipe with a damp cloth, then dry. This removes lingering odors.
- Clean the heating element: See the next section for detailed instructions on this critical step.
Don’t skip the deodorizing step if you’ve been cooking fish or strong-smelling foods. Vinegar neutralizes odors without leaving its own smell behind once it dries.
💡 Simply Air Cook Pro Tip
Line your air fryer basket with parchment paper or a silicone liner during cooking to catch drips and crumbs. This cuts your cleaning time in half and protects the nonstick coating from scratches. Just make sure the liner has holes for airflow and never use it during preheat — it can blow around and touch the heating element.
How to Clean the Heating Element
This is the part most people ignore, and it’s a mistake. A dirty heating element can smoke, smell, and cook unevenly. The good news? It’s easier to clean than you think.
Cleaning the Heating Element Safely
Always unplug your air fryer first — this isn’t optional. Let it cool completely, at least 30 minutes. The heating element is usually on the top inside the unit, and it looks like a coil or a flat surface with ridges.
Turn the air fryer upside down so you can see the element clearly. Use a soft-bristle brush or dry toothbrush to gently brush away crumbs and oil buildup. Never use water directly on the element — it can damage the electrical components.
For stuck-on grease, dip your brush in a tiny bit of dish soap mixed with water, then gently scrub. Immediately wipe with a barely damp cloth to remove soap residue. Let it air dry completely before plugging in again.
Check the element every few uses, especially after cooking greasy foods. A quick brush takes 30 seconds and prevents that burnt smell next time you cook.
Cleaning the Exterior and Control Panel
The outside of your air fryer gets greasy too, especially around the handle and control panel. A clean exterior isn’t just cosmetic — grease buildup can make buttons sticky and harder to press.
Use a microfiber cloth dampened with warm soapy water to wipe down the entire exterior. For the control panel, use a barely damp cloth — too much water can seep into the buttons and cause malfunctions. Never spray cleaner directly on the control panel; always spray your cloth first.
Dry immediately with a clean, dry microfiber cloth. For stainless steel exteriors, wipe in the direction of the grain to avoid streaks. A drop of white vinegar on your cloth adds extra shine and removes fingerprints.
Common Mistakes to Avoid
Let’s talk about what not to do when you clean your air fryer. These mistakes can damage your appliance or make cleaning harder than it needs to be.
✗ Using Metal Scrubbers
Steel wool and metal scouring pads will scratch the nonstick coating right off your basket and pan. Once that coating is damaged, food sticks worse than ever and the surface becomes harder to clean. Stick with soft sponges, silicone brushes, or nylon scrubbers designed for nonstick surfaces.
✗ Skipping the Cool-Down
Washing a hot air fryer basket under cold water can warp the metal and crack the nonstick coating due to thermal shock. Always wait at least 10 minutes after cooking before you start cleaning. If you’re in a hurry, let it cool on the counter while you eat — it’ll be ready by the time you’re done.
✗ Submerging the Main Unit
The main housing of your air fryer contains electrical components and should never be submerged in water or put in the dishwasher. Only the removable basket and pan are washable. Wipe the interior with a damp cloth only, and keep water away from the heating element and control panel.
✗ Ignoring Stuck-On Food
Letting burnt food sit in your basket makes it exponentially harder to remove later. If you spot stuck-on residue, soak the basket immediately in hot soapy water for 10-15 minutes. For really stubborn spots, fill the basket with hot water, add a drop of dish soap, and run the air fryer at 200°F (93°C) for 3 minutes to loosen the grime — then wash as usual.
✗ Reassembling While Wet
Putting your air fryer back together before everything is completely dry can trap moisture inside, leading to mold, mildew, and unpleasant odors. It can also cause electrical issues over time. Always dry every component thoroughly with a towel or let them air dry for at least 15 minutes before reassembling.
Frequently Asked Questions
How often should I clean my air fryer?
Clean the basket and pan after every use — it takes just 5 minutes and prevents buildup. Do a deep clean once a week if you use your air fryer daily, or every 2-3 weeks if you use it occasionally. Clean the heating element whenever you notice grease or crumbs, usually every 4-5 uses.
Can I put my air fryer basket in the dishwasher?
Most air fryer baskets are dishwasher-safe, but check your manual first. That said, hand washing is gentler on the nonstick coating and helps it last longer. If you do use the dishwasher, place the basket on the top rack and avoid harsh detergents or high-heat dry cycles.
What’s the white residue in my air fryer after cleaning?
That white film is usually leftover baking soda or hard water deposits. Rinse the basket more thoroughly after using baking soda paste, and consider wiping it down with a vinegar-water solution to dissolve mineral buildup. Dry completely to prevent water spots.
How do I get rid of the burnt smell in my air fryer?
Mix equal parts white vinegar and water, spray lightly inside the air fryer, and wipe with a damp cloth. You can also place half a lemon in the basket and run the air fryer at 200°F (93°C) for 3 minutes to freshen it up. Always clean the heating element — burnt food stuck there is usually the culprit.
Can I use oven cleaner on my air fryer?
No, never use oven cleaner or other harsh chemicals. They’ll strip the nonstick coating and leave toxic residue that can contaminate your food. Stick with dish soap, baking soda, and vinegar — they’re safer, cheaper, and just as effective for removing grease.
Why is my air fryer basket sticky after washing?
Stickiness usually means there’s still grease or soap residue left behind. Rewash the basket with hot soapy water, rinse thoroughly, and dry completely. If the stickiness persists, it might be damaged nonstick coating — consider replacing the basket if food starts sticking during cooking.
Is it safe to clean the heating element with water?
Use water very sparingly on the heating element. A barely damp cloth or brush is fine, but never spray water directly or submerge any part of the main unit. Always unplug the air fryer first and let the element dry completely — at least 30 minutes — before plugging it back in.
How do I clean between the air fryer basket holes?
An old toothbrush is perfect for this. Soak the basket in warm soapy water for 10 minutes to loosen debris, then scrub between the holes with the toothbrush. For really stubborn buildup, use a baking soda paste and let it sit for 5 minutes before scrubbing.
What type of air fryer cleaning do you need?
Final Thoughts
Learning how to clean your air fryer properly is one of those small habits that makes a huge difference. A clean air fryer cooks more evenly, lasts years longer, and never greets you with smoke or weird smells when you turn it on.
The best part? It’s easier than you think. A quick wipe-down after each use and a weekly deep clean will keep your air fryer in perfect shape. If you’re looking for more ways to get the most out of your appliance, check out our guides on the best oils for air frying and air fryer temperature tips.
Air fryer cleaning checklist
Now go enjoy that perfectly crispy food — without the guilt of a dirty basket waiting for you afterward.