
This post may contain affiliate links. As an Amazon Associate, I earn from qualifying purchases. If you click and buy, we may earn a small commission at no extra cost to you. Learn more.
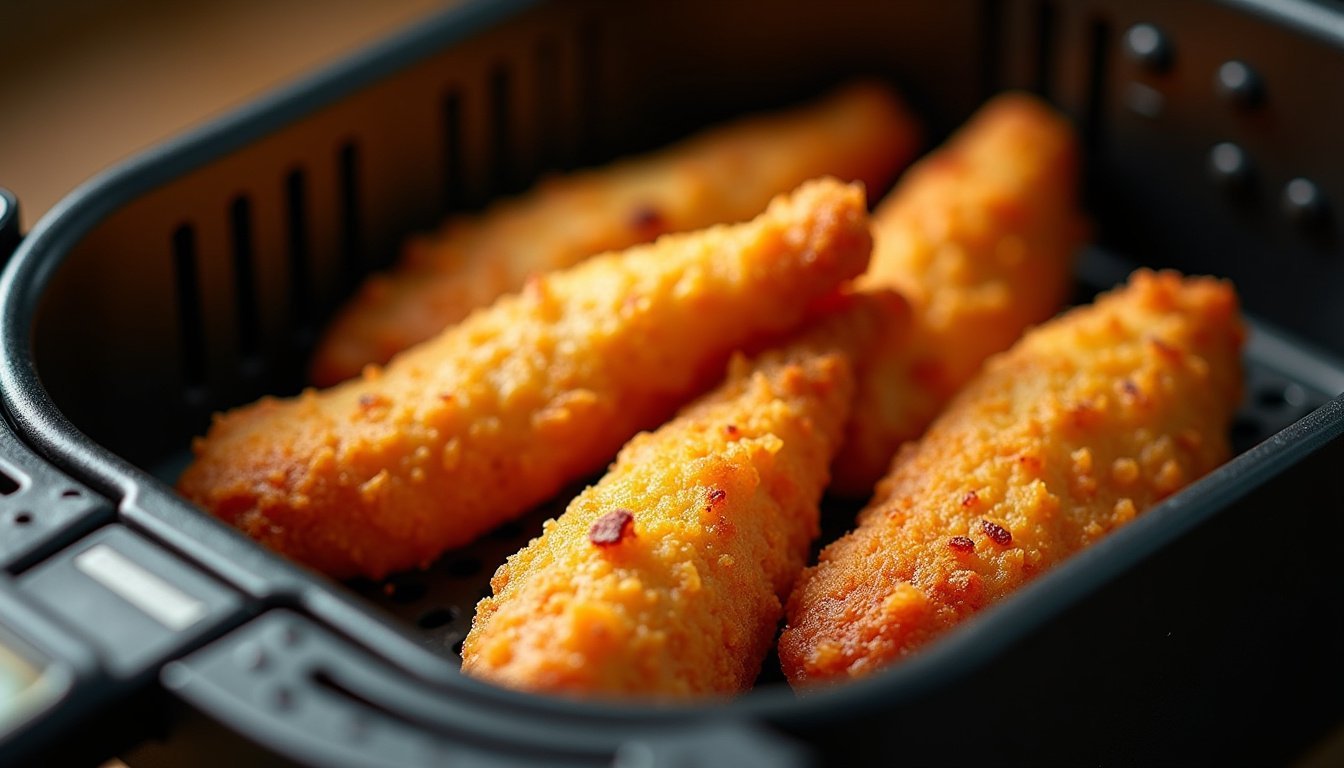
These air fryer witch finger chicken tenders are the perfect spooky treat for Halloween parties — crispy, juicy, and just creepy enough to make everyone smile. The almond “fingernails” and ketchup “blood” turn ordinary chicken tenders into something memorably fun. I made these last year for my niece’s Halloween party, and the kids couldn’t stop laughing while they devoured them. The air fryer makes them perfectly golden and crunchy in just 12 minutes, no deep frying required. You’ll love how easy these air fryer witch finger chicken tenders are to prep ahead and serve warm.
Why You’ll Love This Recipe
- ✓Ready in under 30 minutes from start to finish — perfect for busy party prep
- ✓Kids absolutely love the creepy presentation but they’re eating real protein
- ✓Crispy coating without the mess and oil of deep frying
- ✓Easy to make ahead and reheat right before guests arrive
- ✓Works with chicken tenderloins or sliced chicken breasts — totally flexible
- ✓The almond “nails” stay put beautifully and add a fun crunch
Ingredients
For the Chicken:
- 1 pound chicken tenderloins (about 8-10 pieces)
- 1 cup all-purpose flour
- 2 large eggs
- 1 cup panko breadcrumbs
- 1/2 cup grated Parmesan cheese
- 1 teaspoon garlic powder
- 1 teaspoon paprika
- 1/2 teaspoon salt
- 1/4 teaspoon black pepper
- Cooking spray
For the Witch Fingers:
- 20-24 sliced almonds
- Ketchup for serving
Substitution Notes: You can use regular breadcrumbs instead of panko, but panko gives you that extra crunch. If someone has a nut allergy, use small pieces of bell pepper or carrot for the “nails” instead of almonds. Gluten-free? Swap the flour and breadcrumbs for gluten-free versions — they work perfectly in the air fryer.
How to Make Air Fryer Witch Finger Chicken Tenders
These spooky chicken fingers come together with a simple three-step breading process, then the air fryer does all the work to get them crispy and golden.
- Prep your breading stations. Set up three shallow bowls — one with flour, one with beaten eggs, and one with panko breadcrumbs mixed with Parmesan, garlic powder, paprika, salt, and pepper.
- Trim the chicken tenders. If your chicken tenderloins have the small tendon strip, remove it so they look more finger-like. Pat the chicken completely dry with paper towels.
- Create the knuckle. Using a butter knife, gently press an indentation about 1 inch from one end of each tender to create a knuckle line — this makes them look more realistic.
- Bread the tenders. Dredge each tender in flour, shake off excess, dip in egg, then press firmly into the breadcrumb mixture to coat completely. Place on a plate.
- Add the fingernails. Press one sliced almond into the narrow end of each breaded tender to create a fingernail. Press firmly so it sticks into the breading.
- Preheat and arrange. Preheat your air fryer to 400°F (200°C) for 3 minutes. Spray the basket with cooking spray, then arrange the tenders in a single layer without touching. Spray the tops lightly with cooking spray.
- Air fry the witch fingers. Cook at 400°F (200°C) for 12 minutes, flipping halfway through at the 6-minute mark. They’re done when golden brown and the internal temperature reaches 165°F (74°C).
- Serve with blood. Let the tenders rest for 2 minutes, then arrange on a platter with a small bowl of ketchup for dipping — or drizzle ketchup at the base of each “nail” for extra drama.
💡 Air Fryer Pro Tip
Don’t skip the cooking spray on top of the breaded tenders — it’s what makes the panko turn that gorgeous golden brown instead of staying pale. I spray once before cooking and give them another quick spritz when I flip them at the halfway point.
Recipe Variations
◆ Spicy Witch Fingers
Add 1/2 teaspoon cayenne pepper and 1 teaspoon smoked paprika to your breadcrumb mixture for a kick. You can also toss the finished tenders in buffalo sauce and use ranch as your “blood” dipping sauce. The contrast of spicy chicken with creamy ranch is addictive.
◆ Parmesan Herb Witch Fingers
Double the Parmesan to 1 cup and add 1 tablespoon Italian seasoning to the breadcrumb mixture. These taste like elevated chicken tenders with a restaurant-quality crust. Serve with marinara sauce as your “blood” for an Italian twist that adults especially love.
◆ Gluten-Free Witch Fingers
Use gluten-free all-purpose flour and gluten-free panko breadcrumbs in the exact same quantities. The texture comes out just as crispy in the air fryer. Make sure your cooking spray is also gluten-free, and you’ve got a spooky treat everyone at the party can enjoy safely.
What to Serve With Air Fryer Witch Finger Chicken Tenders
These creepy chicken tenders pair beautifully with classic party sides. Serve them alongside sweet potato fries or regular air fryer french fries for a complete finger food spread. A simple green salad with ranch dressing balances out the richness and adds color to your Halloween table.
For a full spooky spread, add mac and cheese — you can even dye it orange for extra Halloween vibes. Corn on the cob or roasted vegetables work great if you want something lighter. And don’t forget multiple dipping sauces — honey mustard, BBQ sauce, and ranch give everyone options beyond the ketchup “blood.”
If you’re serving these as an appetizer, pair them with other finger foods like mozzarella sticks, air fryer potato wedges, or veggie sticks with dip. The variety keeps your party table interesting and ensures there’s something for everyone.
Storage & Reheating
Refrigerator: Store leftover witch finger chicken tenders in an airtight container in the fridge for up to 3 days. Keep the almonds attached — they’ll stay put just fine. Don’t store them with the ketchup or any dipping sauce, as that’ll make the breading soggy.
Freezer: These freeze beautifully for up to 2 months. Let them cool completely, then arrange in a single layer on a baking sheet and freeze until solid (about 2 hours). Transfer to a freezer bag with parchment paper between layers. The almonds might fall off during freezing, but you can easily press them back on after reheating.
Reheating: The air fryer is your best friend here. Reheat at 350°F (175°C) for 5 minutes straight from the fridge, or 8 minutes from frozen. They’ll crisp back up beautifully and taste freshly made. Skip the microwave — it turns the breading soft and rubbery.
Frequently Asked Questions
Can I use chicken breast instead of tenderloins for witch finger chicken tenders?
Absolutely! Slice chicken breasts lengthwise into strips about 1 inch wide and 4-5 inches long to mimic the shape of fingers. You might need to adjust cooking time by 1-2 minutes depending on thickness — just make sure they reach 165°F (74°C) internal temperature. The shape won’t be quite as naturally finger-like, but they’ll still look plenty spooky with the almond nails.
Why do my almond fingernails keep falling off?
This usually happens if the breading isn’t thick enough or you’re not pressing the almonds in firmly enough. After coating in breadcrumbs, press each almond deeply into the breading at a slight angle, pushing it about halfway into the tender. The egg wash underneath acts like glue once it cooks. If you’re still having trouble, dab a tiny bit of raw egg white on the back of the almond before pressing it in.
Can I make air fryer witch finger chicken tenders ahead of time?
Yes! You can bread the tenders completely and attach the almonds up to 4 hours ahead. Arrange them on a parchment-lined baking sheet, cover loosely with plastic wrap, and refrigerate until you’re ready to cook. Let them sit at room temperature for 10 minutes before air frying. This actually helps the breading adhere even better during cooking.
What’s the best way to make the knuckle indentation realistic?
Use the back of a butter knife and press gently but firmly about 1 inch from the almond end, rolling the knife slightly to create a curved line across the tender. Don’t press so hard that you cut into the chicken — you just want a visible indentation. You can also add a second, lighter line about 2 inches from the end for a double-knuckle effect that looks even more realistic.
Can I bake these in a regular oven instead of an air fryer?
You can, though they won’t get quite as crispy. Preheat your oven to 425°F (220°C) and place the breaded tenders on a wire rack set over a baking sheet. Spray generously with cooking spray and bake for 18-20 minutes, flipping once halfway through. The air fryer’s circulating heat really makes a difference in the crunch factor, but the oven method still works in a pinch.
Simply Air Cook
Air Fryer Witch Finger Chicken Tenders
Crispy, juicy chicken tenders transformed into spooky witch fingers with almond nails — perfect for Halloween parties and ready in just 12 minutes.
Ingredients
- 1 pound chicken tenderloins (8-10 pieces)
- 1 cup all-purpose flour
- 2 large eggs, beaten
- 1 cup panko breadcrumbs
- 1/2 cup grated Parmesan cheese
- 1 teaspoon garlic powder
- 1 teaspoon paprika
- 1/2 teaspoon salt
- 1/4 teaspoon black pepper
- 20-24 sliced almonds
- Cooking spray
- Ketchup for serving
Instructions
- 1Set up three shallow bowls with flour in the first, beaten eggs in the second, and panko mixed with Parmesan, garlic powder, paprika, salt, and pepper in the third.
- 2Pat chicken tenderloins dry and use a butter knife to press a gentle indentation 1 inch from one end of each tender to create a knuckle line.
- 3Dredge each tender in flour, dip in egg, then press firmly into breadcrumb mixture to coat completely.
- 4Press one sliced almond firmly into the narrow end of each breaded tender to create a fingernail.
- 5Preheat air fryer to 400°F (200°C) for 3 minutes, then spray basket with cooking spray.
- 6Arrange tenders in a single layer without touching, spray tops with cooking spray, and cook at 400°F (200°C) for 12 minutes, flipping at 6 minutes.
- 7Check that internal temperature reaches 165°F (74°C) and coating is golden brown.
- 8Let rest 2 minutes, then serve on a platter with ketchup for dipping.
🍽 Cuisine: American
🏷 Course: Appetizer
Author: Simply Air Cook · Simply Air Cook